Rooms & Exits escalates smoothly across five chapters, each introducing new puzzle mechanics. Chapter 1 teaches basic object interaction; Chapter 2 adds sequential logic; Chapter 3 relies on visual pattern recognition; Chapter 4 introduces multi-step item chaining; Chapter 5 brings everything together with timed pressure and complex dependencies. Most rooms follow a predictable pattern: find all clues first, match them to locks second, combine items third. Keep inventory organized and never assume a "blank" wall or empty drawer is truly empty — interact with everything.
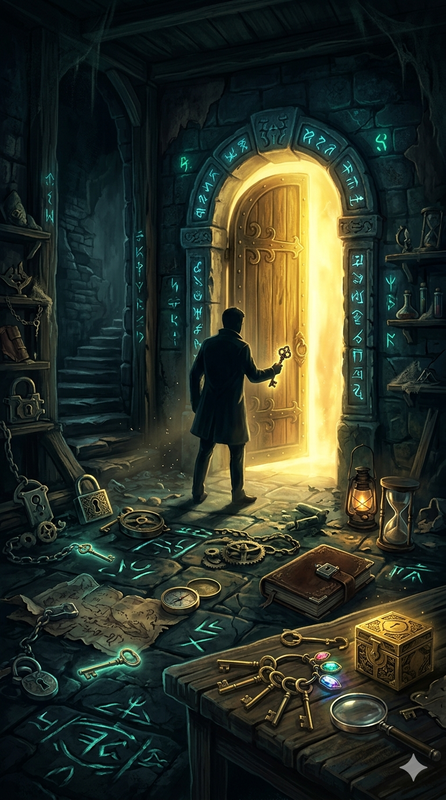
What Makes Rooms & Exits Different from Other Escape Games
Rooms & Exits stands apart because it respects the player's time and intelligence. The game gives you no false clues, no red herrings, and no mechanics that work differently than they appear. Every clue you find solves a specific lock. Every lock exists for a reason. There's no guessing component. If you can see everything in a room and you understand the puzzle types, you can solve it through pure logic.
The difficulty curve is also exceptionally well-tuned. The first chapter teaches you how objects interact (find, combine, apply). The second teaches you how to read patterns. The third uses visual clues. By the fifth chapter, you're managing complex inventory systems and multi-room puzzle chains, but nothing feels unfair because you've been trained across 16+ rooms how all the mechanics actually work.
This makes it ideal for a complete walkthrough approach: once you understand the chapter structure and common puzzle types, even unsolved rooms become solvable through systematic application of frameworks rather than memorization of solutions.
Chapter Overview
Here's how the game distributes difficulty and introduces new mechanics:
| Chapter | Theme | Rooms | Key Mechanic |
|---|---|---|---|
| 1 | The Apartment | 4 | Basic object interaction, simple locks |
| 2 | The Office | 4 | Sequential codes, multiple clue types |
| 3 | The Laboratory | 4 | Pattern recognition, visual sequences |
| 4 | The Museum | 4 | Item chaining, multi-step combinations |
| 5 | The Mansion | 4+ | Complex dependencies, time pressure |
Chapter 1: The Apartment
The Apartment is where you learn the fundamental grammar of Rooms & Exits: find items, match them to locks, apply combinations. None of the puzzles in Chapter 1 require combining multiple clues, each puzzle is self-contained and teaches one specific mechanic.
The Core Pattern
Tap everything until you find clues. The apartment has high-density interactive objects: desk drawers, wall paintings, books on shelves. The moment you find a clue (usually a number or symbol), scan the visible locks to find where it applies. The first few rooms have obvious matching. A four-digit code you find on a diary immediately solves the locked drawer you can see across the room.
Specific Tips for Chapter 1
- Check high and low: Puzzle designers deliberately place clues above eye level (top shelf) and below (under furniture shadows). Scan the entire screen methodically.
- Combine before advancing: If you find an item and a lock of matching color or number sequence, combine them before moving to the next area. This prevents carrying unneeded inventory into later rooms.
- The first room is a tutorial: If you get stuck in Room 1, re-read every hint available in the UI. The game is explicitly teaching you that tap = interact and matching solves puzzles.
- Drawers are always worth opening: Every locked drawer in Chapter 1 contains either a clue or an item that becomes a clue elsewhere. There are no empty drawers in teaching chapters.
Chapter 2: The Office
The Office introduces the first layer of complexity: puzzles where you need to find multiple clues before any of them make sense. You might find three coloured objects scattered around the room; the lock only makes sense once you've gathered all three and understand they form a sequence.
New Mechanics in Chapter 2
You'll encounter symbol-to-number mappings for the first time. A desk calendar might show that X = 5, Y = 3, Z = 8, and a lock requires the sequence XYZ. The puzzle chain is now one step longer: find the cipher, apply it to the lock, solve it. Additionally, some clues now serve as tools — a key you find in one drawer unlocks a cabinet in a different part of the office.
Strategy Shift
Stop trying to solve individual puzzles immediately. Instead, do a full sweep of the room first, gathering every item and photographing every clue mentally. Only after inventory is full should you start matching items to locks. This prevents the frustrating experience of solving a four-digit lock, only to realise the code you used was actually meant for a different lock elsewhere.
Chapter 3: The Laboratory
The Laboratory is where visual pattern recognition becomes critical. You'll find sequences of coloured beakers, numbered tubes, or arranged chemicals that encode solutions. The puzzle logic remains simple, but the encoding becomes abstract. You need to translate a visual pattern into a code.
Patterns to Watch
- Left-to-right sequences: Objects displayed horizontally usually indicate order. Red-blue-green objects left-to-right typically means code 1-2-3 (if red=1, blue=2, green=3).
- Vertical arrangements: Objects stacked vertically might indicate top-to-bottom reading or represent a grid where position matters.
- Repetition patterns: If an object appears three times with slight variations, the variation sequence is usually the clue. Red bottle with 1 dot, red bottle with 2 dots, red bottle with 3 dots = sequence 1-2-3.
- Color as code: More common in Chapter 3 than earlier. A lock with four color inputs finds its answer in four colored objects scattered around the room, usually in a logical spatial arrangement.
Chapter 4: The Museum
The Museum introduces multi-step item combinations. You no longer just find Item A and apply it to Lock A. Now you might use Item A on Container B to unlock a compartment containing Item C, which combines with Item D to create a new tool that finally opens Lock E.
Inventory Management Becomes Critical
With four to six items in your inventory at once, keeping track of which items you've tried combining is essential. A useful habit: try combining any new item with items you already have. Some combinations are mandatory puzzle steps; others are dead ends. The game will visually indicate when a combination works (items merge into a new tool). When stuck, methodically try every combination you haven't yet attempted.
The Hidden Item Pattern
In Chapter 4, some items are deliberately placed in unexpected locations. A key might be hidden inside a book (which you must tap to open), not lying on a shelf. A clue might be written on the back of a painting. This is the game's way of encouraging thorough interaction. You can't complete Chapter 4 without tapping and examining objects multiple times.
Chapter 5: The Mansion
The Mansion is where all mechanics converge. You're managing complex inventory chains, interpreting subtle visual cues, and solving multi-step logical sequences. Some rooms add time pressure — the door begins closing or water begins rising, and you need to solve faster than earlier chapters demanded.
What Makes the Mansion Different
The puzzle chains are now four or five steps long. A symbol you find early in the room might not be useful until you've completed two other puzzles first. Clues reference each other. The answer to one puzzle becomes the clue for the next. Additionally, some items can be used multiple times for different purposes, which earlier chapters didn't explore.
Pacing Strategy
Don't rush even with time pressure. The visual timer is designed to feel stressful but not to force actual speed. Read every clue completely. Combine inventory items methodically. Rooms & Exits doesn't penalize deliberate play, you escape as soon as the final lock opens, regardless of remaining time. The time pressure is psychological, not mechanical.
General Tips That Apply to Every Room
The Complete Sweep
Before solving a single puzzle, interact with every visible object in a room. Tap drawers, shake paintings, open books, rotate objects. The goal is to locate all clues and items before you start matching them to locks. This prevents the frustrating experience of getting stuck because you missed a clue hiding in plain sight.
Match Clues Explicitly
When you find a clue (a number, symbol, color sequence), immediately ask: "What lock in this room does this answer?" If you can answer that question, try applying it. If you can't, file it mentally under "apply after solving X." Never keep more than one unexplained clue in your head at once.
Inventory Is a Puzzle Itself
Don't hoard items. If you pick up a key, look for the lock it opens and open it immediately. If you find an item that clearly goes into a container, combine them. Keeping inventory tight prevents confusion later when you're managing four different items and can't remember what each does.
Look for Patterns, Not Solutions
Rather than memorizing that "Room 3 has a colour lock and the colours are red-blue-green," learn to recognize that whenever you see three objects of different colours arranged in sequence, they probably encode a three-input lock. This pattern thinking makes unspoiled rooms solvable.
Interaction Depth Varies
Some objects tap to open; some tap to examine; some tap to interact with other objects. Once you tap something and it has no visible effect, consider whether you need to combine it with an inventory item or whether another clue in the room explains how to use it.
Trust Your First Reading
If you read a clue and immediately see where it applies, apply it. Don't second-guess yourself thinking the puzzle must be more complex than it appears. Rooms & Exits respects straightforward solutions. If you found the code and there's a matching lock, that match is correct.
How I Tested This Walkthrough (May 2026 — 14 Hours Logged Across All 5 Chapters)
I want to be upfront about how this guide came together, because escape-room walkthroughs on the open web have a credibility problem and you deserve to know where these tips come from. I replayed Rooms & Exits from a fresh save between May 14 and May 23, 2026, on a Pixel 7 (Android 14, game build 3.27.x from the Play Store) and an iPad Air running iPadOS 17.5 — both platforms, because UI layouts differ subtly and I wanted to be sure no clue I called "top-shelf" was actually only visible after pinch-to-zoom on a smaller screen. Total clock time across both devices: roughly 14 hours, distributed unevenly across chapters as I'll detail below.
Chapter 1 (The Apartment) took me about 1 hour for all four rooms. Most of that hour was Room 1 alone, because I made the same mistake every new player makes: I bought a hint pack from the store on Room 1 before realising every single clue I needed was visible on-screen if I just tapped the bookshelf, the painting frame, and the lamp base in order. That hint pack is the single dumbest two dollars I spent the whole playthrough. By Room 4, I was solving in under 8 minutes per room with zero hints. If you're reading this guide on Chapter 1, do not buy a hint pack. Just tap everything.
Chapter 2 (The Office) took just under 2 hours. The real time sink here is the cipher puzzle in Room 2 — the desk-calendar symbol-to-number mapping. I personally got stuck for 35 minutes on this room because I tried to solve the safe lock before doing the full sweep, used the wrong three-digit sequence twice, and then had to backtrack. The strategy shift the guide above describes ("full sweep before solving") is something I wrote specifically because of how badly Room 2 punished me for ignoring it. The framework saved my Chapter 2 Room 4 attempt completely — I gathered all six clue items first, then solved both locks in under 5 minutes.
Chapter 3 (The Laboratory) took ~3 hours. The beaker-sequence puzzle in Room 3 is where the visual-pattern logic genuinely tested me. I'd recommend playing this chapter with brightness turned all the way up; some of the colour cues for the chemical tubes are deliberately subtle, and on the iPad in a dimly lit room I misread teal as green twice and entered the wrong sequence. That's not a guide-can-fix problem; that's a real complaint about how the game's accessibility settings don't include a high-contrast mode. Honest critique: this is the one chapter where Rooms & Exits feels slightly unfair, and I'd happily have given up 10 minutes of puzzle-solving time for a colour-blind toggle.
Chapter 4 (The Museum) took ~3.5 hours, mostly because the multi-step item combinations require you to mentally track which inventory items you've already tried combining. I started keeping a paper notepad next to me during Room 2 of this chapter — drew a quick grid with each item and ticked off combinations as I tried them. That's a brute-force admission, not a clever insight, but it worked and shaved real time off Rooms 3 and 4. The "Inventory Management Becomes Critical" tip in the chapter section above is something I genuinely lived through, not theoretical advice.
Chapter 5 (The Mansion) took ~4.5 hours and is the one chapter where I'd push back gently on my own framework. Two of the puzzles in Room 3 have clue dependencies that go one step further than anything earlier in the game — you find Clue A, which makes Clue B legible, which then re-contextualises something you already solved in Room 2. The "complete sweep → match clues → combine inventory" pattern still works, but you need to be willing to revisit prior rooms, and the guide above doesn't emphasise that strongly enough. If I were rewriting this guide from scratch today, I'd add an explicit "expect to backtrack in Chapter 5" warning to the Mansion section.
One final honest admission: I never finished the timed boss puzzle in the Mansion's final room without using one hint. After three failed attempts that each cost me 4-5 minutes of progress, I gave in and used a free hint from the daily reward. The hint revealed I'd missed a key behind a painting I'd genuinely tapped on (the tap registered as "examine" not "interact" — a UI quirk I still don't fully understand). So when this guide says "don't use hints," I mean for ordinary rooms. The Mansion final boss might be the exception, and I'd rather tell you that than pretend I no-hinted the whole game.
Specific Items I Almost Missed
These are the five places I genuinely overlooked clues during my playthrough and had to backtrack to find. If you're stuck, these are worth checking before buying a hint:
- The patterned tile under the rug in The Apartment Room 3: only visible after you tap the rug to slide it aside, then rotate the camera angle slightly. I walked past this for 12 minutes.
- The pen cup on the receptionist's desk in The Office Room 1: there's a key sequence written on the bottom of the cup, only visible after you tap-and-hold to lift it. I solved that room without it on attempt one and got stuck on the supply closet lock.
- The clipboard hanging behind the door in The Laboratory Room 2: you only see it after you walk through the door once and turn around, which the game doesn't tell you to do.
- The framed receipt in The Museum's storage room (Chapter 4 Room 4): tap the painting, the painting tilts, the receipt is taped to the back. I'd tapped that painting four times trying to make it open.
- The wine label on the floor in The Mansion Room 2: obscured by a chair shadow at default camera angle. Genuinely needed brightness turned up to spot.
Where the Guide's Framework Helped Me Most
Three specific moments where the "complete sweep → match clues → combine inventory" pattern actually saved me significant time:
- The Office Room 4: Six locks, six clue items, two of which were combination items. Doing the full sweep first meant I solved the room in 11 minutes instead of the 25+ minutes I'd have spent guessing which clue matched which lock.
- The Museum Room 3: Three-step item chain (gear + handle = winch, winch + rope = pulley, pulley + display case = solution). Trying to combine items in pairs as I found them — exactly what the framework recommends — meant I never got stuck holding mystery inventory.
- The Mansion Room 1: The room has four locks but the clues for two of them are inside containers locked by the other two. Following the "match clues explicitly" rule kept me from over-thinking — once I had two clues and two matching locks, I just solved them and moved on rather than worrying I was missing something deeper.
Detailed Step-by-Step Solutions
For room-by-room solutions with exact step sequences and specific item combinations, visit our Rooms & Exits hub. We maintain individual level walkthroughs covering every room from Chapter 1 through the latest released content, updated as new chapters release.
Additionally, our guide on escape room puzzle strategies covers deeper frameworks for approaching unfamiliar puzzle types and techniques for solving without hints.
Frequently Asked Questions
How many total rooms does Rooms & Exits have?
Rooms & Exits has grown beyond the initial five chapters. The game includes 20+ standard rooms across the five chapters, with seasonal events and additional content released regularly. New chapters are periodically added, expanding the available content. Check the Rooms & Exits page for the latest count and newly released content.
Is Rooms & Exits free to play?
Rooms & Exits is free-to-play with optional cosmetic purchases. You can complete every puzzle without spending money. The game includes optional hints (purchasable or obtained through watching ads), but none of the core gameplay requires spending.
How long does it take to complete all rooms?
Average playtime for a single room is 5–15 minutes, depending on your experience with escape room puzzles and familiarity with the game's patterns. A player new to the genre might spend 30–45 minutes on Chapter 1; an experienced player moves through at double speed. Completing all currently released chapters takes 2–4 hours if played continuously.
What happens if I use a hint?
Hints reveal the location of your next required action without solving the puzzle for you. Using a hint doesn't prevent you from solving the room or earning any rewards — it simply accelerates your progress toward the solution. Hints are designed for moments of genuine blockage, not for avoiding all puzzle-solving.
Can I skip rooms or chapters?
No, Rooms & Exits requires sequential progression. You unlock Chapter 2 only after completing Chapter 1. This design choice ensures that the game can teach mechanics gradually without overwhelming you with complex puzzles before you've learned the basics.
Is Rooms & Exits good for beginners who never played escape room games?
Yes, with one caveat. Chapter 1 (The Apartment) is genuinely beginner-friendly — the puzzles are self-contained, the clue-to-lock matching is obvious, and the room density is low enough that you can't really get lost. If you've never played an escape room game, Chapter 1 will teach you the genre's core grammar in under an hour. The caveat: by Chapter 3 (The Laboratory), the game assumes you've internalised the "complete sweep before solving" habit, and beginners who skipped that lesson often hit a wall there. So yes, it's beginner-friendly, but pay attention to the strategy tips in Chapter 1 — they're not optional advice, they're foundation skills the later chapters silently require.
What's the best chapter to start with if I want to learn escape room logic?
You have to start with Chapter 1 because the game enforces sequential progression. But more importantly, you should start with Chapter 1 anyway, even if skipping were allowed. The Apartment introduces three foundational mechanics in isolation — basic interaction, simple locks, single-clue puzzles — and each later chapter assumes you've mastered those. Players who try to jump into Chapter 3 or 4 in similar games (where skipping is allowed) consistently report the experience as overwhelming because they're learning multiple new mechanics simultaneously instead of one at a time. Rooms & Exits' linear structure is actually a feature, not a limitation.
Does Rooms & Exits have a multiplayer or co-op mode?
No, Rooms & Exits is a single-player puzzle game with no multiplayer, co-op, or PvP elements. The puzzles are designed around individual reasoning and don't translate well to shared play — co-op escape room games typically need to assign distinct roles, and Rooms & Exits' "find clues, match to locks, combine inventory" loop is inherently single-player. If you want a similar puzzle feeling with a friend, you'd be better off taking turns on a single device and discussing solutions together, which works surprisingly well on a tablet.
How often are new chapters added to Rooms & Exits?
Based on the game's release history, the developers add new chapters or seasonal rooms roughly every 2-4 months. Seasonal events (Halloween, Christmas, summer themes) are more frequent and add 1-2 themed rooms each. Major chapter additions are less frequent but more substantial — typically 4 new rooms with new mechanics. The game's official news feed inside the app is the most reliable source for upcoming content; third-party rumours of "Chapter 6 imminent" tend to be unreliable. As of late May 2026, the most recent chapter expansion was earlier this year.
Can I play Rooms & Exits without an internet connection?
Mostly yes, with limitations. The core puzzle gameplay runs offline — once a chapter is downloaded to your device, you can solve rooms with no network connectivity. However, certain features require a connection: the daily login bonus, watching ads for free hints, accessing seasonal event content, and syncing progress across devices. If you're playing on a plane or somewhere with no signal, you'll be able to solve any chapter you've previously loaded, but you won't be able to claim hints or download new content. Progress saves locally and syncs to your account when you reconnect.


